Finger jointing is recognized as the most stable method of wood joints in length direction. Totally different from a type of box joint sharing the same name “finger Joint”, is the process of cutting “teeth” or “fingers” into each end of small blocks and gluing the blocks together end-to-end to form one long piece of wood. Finger jointing short pieces of lumber have become an increasingly popular method of reducing wood waste and utilizing shorts to realize maximum profit from the steadily rising cost of raw materials.

Finger-jointed material is preferred to solid in many applications because it is less expensive and it can be structurally stronger and more stable. Not sure where and when it was invented, but was introduced to China from Japan in the 90s, when my father was managing a factory that makes finger-joint hardwood flooring for Japanese customers. The flooring is made out of a finger joint and edge-glued board with tongue and groove, the finger joint structure eliminates the stress of wood, so the flooring is stable even with only one layer of solid wood. North American customers slowly accepted products made out of FJ and EG board after sourcing from China since the early of this century, but I found that there’re still many customers who don’t know what it is when I explain the finger-joint drawer sides we’re making.
To introduce how we make FJ and EG materials and more important – what makes them fail, I break down our production process below. When a weak or faulty finger joint occurs, a common and easy explanation for failure is that the adhesive is no good. This may be true but is seldom the case. A small error in every step of the process may cause a problem.
1. Preparing Materials
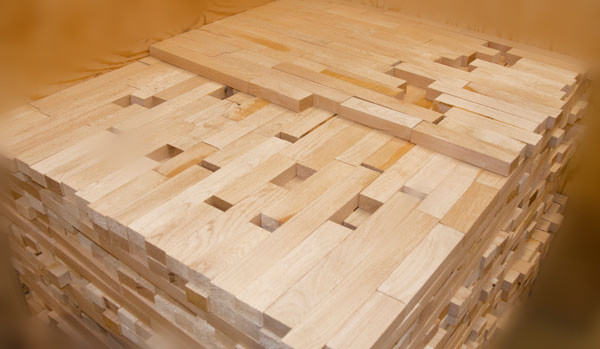
a) Trimming. Kiln-dried and flat rough lumber is cut into stave blocks of certain width and thickness, and defects like knots, cracks, blemishes, and wane… are removed by cutting long staves in random lengths within a certain range.
b) Sorting. The stave blocks are sorted for size and grade and inspected again. Color and grain issues are matched here, for making boards in different grades.
Tips: Being accurate in both thickness and width is very important, the uneven joints will “swallow up” huge amounts of materials, and even worse, the board might be not thick enough already before being made into final products. This first step decides the most of material loss of the entire process.
After trimming and sorting, stave blocks are assembled for the finger jointing process.
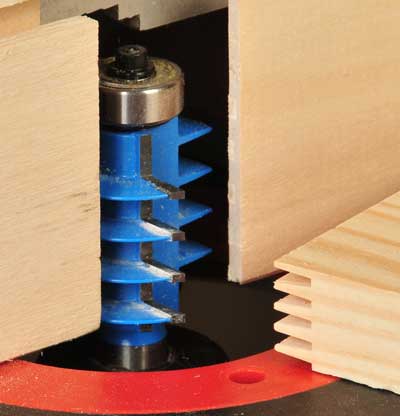
2. Cutting Finger Joint
The stave blocks go to the automated finger jointing machine, with “fingers” at both ends. Finger length varies in different countries, 10-12mm is the standard length in China.
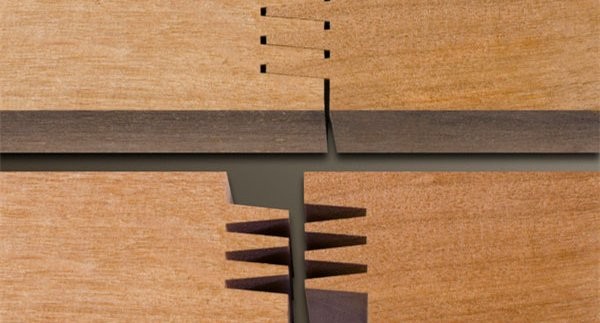
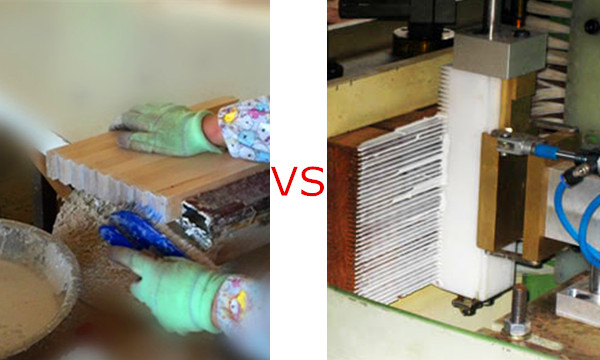
There’re two ways to cut fingers, the one with fingers seen on faces and the other seen on edges, we may call them visible and invisible finger joints respectively in terms of how it looks on faces. It’s faster to cut visible fingers but looks less appealing than the other.
3. Brushing Glue
Brush glue to the fingers manually or let the machine apply it automatically on the line right after the fingers are cut.
Tips: Making sure the fingers are fully glued is crucially important, with that being said, a machine is always more reliable than a man. You get consistent quality with the machine while inconsistent and unpredictable outcomes with a manual brush.
4. Pressing
Press the joints tight without pin holes and gaps, and the glue lines squeezed out show whether the fingers are well glued in step 3.
5. Curing for FJ
It’s crucial important to ensure at least 24 hours glue curing, 72 hours the best if time permitted, especially when the temperature is low.
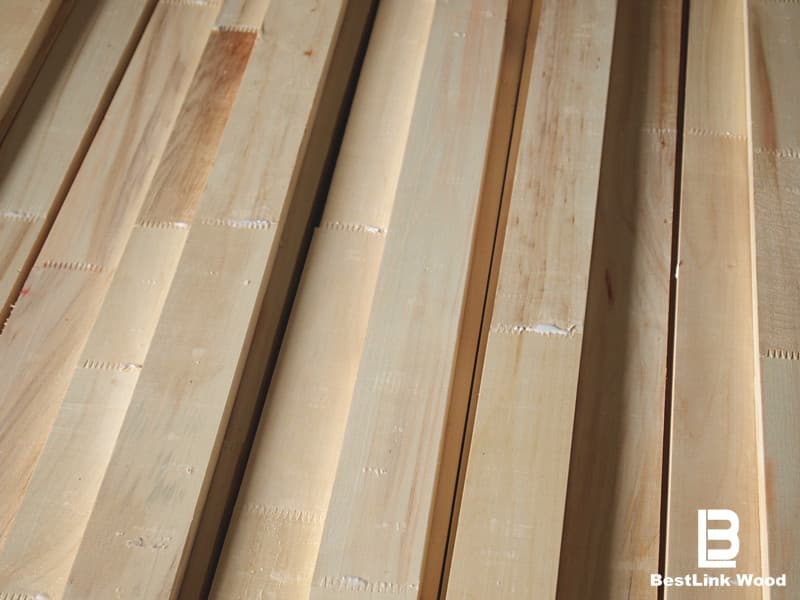
6. Planing
Long finger jointed staves cured are next sent to a planing station where all four sides are planed smooth. This is preparation for edge or face gluing to make panels or laminated shapes.
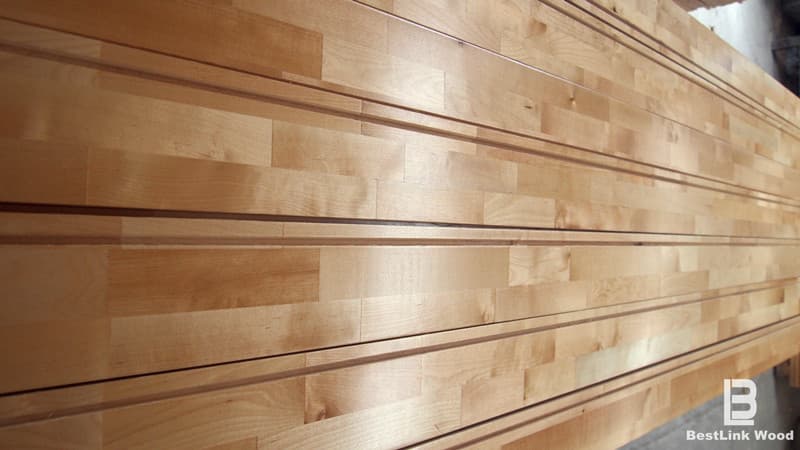
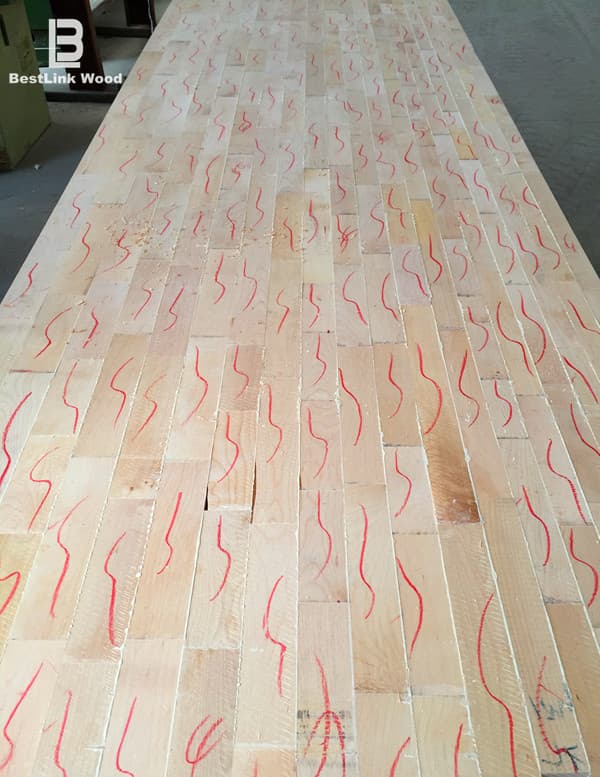
7. Edge Glue
The planed staves are examined and arranged to create the highest quality panel possible. Each panel is graded as to front and back quality. During the inspection and layup process, the grader draws a fast crayon line across the final panel design. The crayon line allows the panels to be quickly reordered in the proper sequence at the gluing station. The staves now have glue applied to their edges, and then sent through the compressing process that creates the actual panel from the individual staves.
Tips:
- Optimal grading and panel assembly at this station is key to the quality and value of the final product.
- Quickly use up the adhesive mixed with curing agent within 10-20 mins, depending on the workshop temperature.
- Pressing 30-60 mins before moving away the clamps.
8. Curing for EG
Leave the edge glued boards being cured for 48-72 hours, and warm up the temperature surrounded with a heater if it’s cold in the workshop.
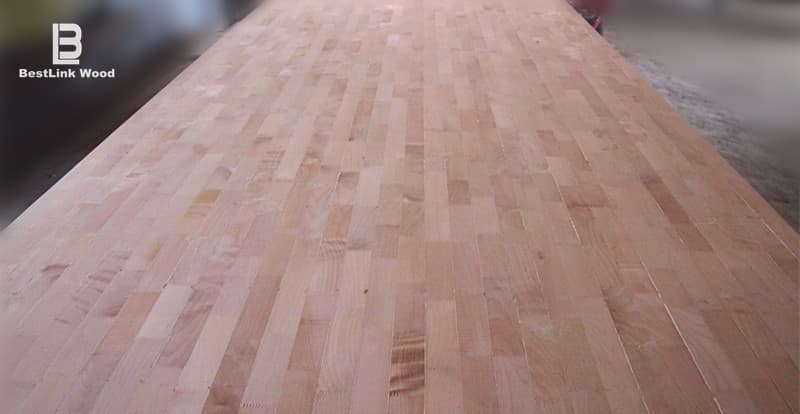
9. Sanding
The cured panels go to the sanding station, to be sanded off glue lines and get the desired thickness. Uneven panels are rejected or resanded if that is possible. The panels are usually resawn and transformed into blanks and made into many products like drawer sides, countertops, cutting boards, furniture, flooring….
The entire process generates 40-50% wood loss depending on the quality of the rough lumber starting with. And back to “what make finger joint fail”, instead of blaming it on glue, step 3 and 5 are usually ignored and tend to cause weak finger joints.
What problems have you came across when making or using FJ or EG materials?